


Scribal Profile Unknown | |
| Current Manuscript: | Oxford, Bodleian Library MS Douce 323 |
| Folios: | 1-168 |
| Sampled Folios: | 109v |
| Example Page: | Display a full page showing this scribe's hand |
| Image Rights: | Reproduced with permission of The Bodleian Library, University of Oxford, 2011; all rights reserved. All images on this website are reproduced with permission of the Libraries, Archives, and Owners of the manuscripts. Manuscript images that appear on this website remain in the copyright of the libraries where the manuscripts are held. Use of these images for any purpose other than private study without written permission of those libraries is prohibited by law. |
| A | |||
 | Usage: aboute the majority of the scribe's 'a's are single compartment. However, he has a tendency to include the upper case version of 'A' when 'a' begins a word, or even in the middle of a word. | 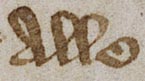 | Usage: Alle last word in a line so not an upper case graph. |
 | Usage: name here the 'a' is the second letter but stands far above surrounding graphs. |  | Usage: And an upper case 'A' at the beginning of a line tipped in red. |
| D | |||
 | Usage: dore the scribe's 'd's are looped and the bowl is quite angular. |  | Usage: Ap(ar)ayled 'd' in final position is frequently tagged with short downward stroke attached to the extended loop-stroke. |
 | Usage: mayde |  | Usage: Drede |
| G | |||
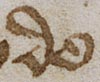
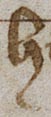
 | Usage: go the scribe's 'g's are mainly double compartment. |  | Usage: gyle there is an occasional single compartment tailed graph with horned head. |
 | Usage: lugged |  | Usage: kyng final 'g' has quite a long horizontal extension from the middle of the upper lobe. |
| H | |||
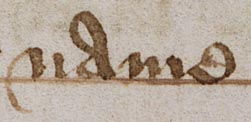
 | Usage: hote the tail of 'h' ends in a counter-clockwise turn. | 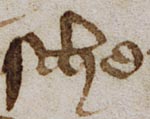 | Usage: sche |
 | Usage: doth it appears that the 'h' after the 't' is crossed but it may just be the scribe extending the cross-bar of 't'. | 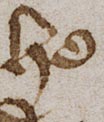 | Usage: he occasionally the stem has a turned foot. |
| R | |||
 | Usage: craft long 'r' is used in all positions. |  | Usage: fayr in final position 'r' is often flourished perhaps to indicate a missing 'e'. |
 | Usage: loured 'z'-shaped 'r' is mainly used after vowels and round-bodied graphs. |  | Usage: frere |
| S | |||
 | Usage: shette the body of the sigma 's' is square-shaped. It is used in initial and in final position. |  | Usage: p(ar)doners |
 | Usage: sche long 's' may be used initially and also medially. |  | Usage: Sonedayes |
| W | |||
 | Usage: whan 'w' has double head-loops but the height and spread may vary with individual graphs. |  | Usage: knowith |
 | Usage: wente |  | Usage: wiȝtlyche |
| Y | |||
 | Usage: lepyn 'y' is essentially the same throughout. |  | Usage: mayde sometimes the second stroke does not connect with the left of the fork, leaving a gap. |
 | Usage: Pylorye |  | Usage: many the tail is generally set at the same angle with counter-clockwise turn. |
| Thorn and Yogh | |||
 | Usage: þe(supercript) thorn is not used very much on this folio. |  | Usage: þoruȝt |
 | Usage: ȝeer again yogh is used as equivalent of both 'y' and 'gh'. |  | Usage: brouȝt |
| Upper Case Letters | |||
 | Usage: Or |  | Usage: By |
 | Usage: Now | 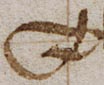 | Usage: The |