

Scribal Profile Hand C | |
| Current Manuscript: | Cambridge, Cambridge University Library MS Mm.2.21 |
| Folios: | ff 65-72v (quire 9) |
| Sampled Folios: | 66r |
| Example Page: | Display a full page showing this scribe's hand |
| Image Rights: | Reproduced by kind permission of the Syndics of Cambridge University Library. All images on this website are reproduced with permission of the Libraries, Archives, and Owners of the manuscripts. Manuscript images that appear on this website remain in the copyright of the libraries where the manuscripts are held. Use of these images for any purpose other than private study without written permission of those libraries is prohibited by law. |
| A | |||
 | Usage: al double compartment 'a' which frequently appears with no separation between upper and lower compartments. |  | Usage: art |
 | Usage: And several slightly different versions of this shape of upper case 'A' may be found on the folio examined. |  | Usage: And |
| D | |||
 | Usage: dore 'd' may be securely looped as in this version with angular lower lobe. |  | Usage: And 'd' may also have an 'open' centre. |
 | Usage: and sometimes the scribe squashes his graphs so that they appear stunted versions of his script. | 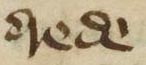 | Usage: drede |
| G | |||
 | Usage: godes this is a fairly robust form of 'g' compared with some of the examples seen on this folio. |  | Usage: goþ here the lower compartment has all but disappeared |
 | Usage: necgligens again the lower compartment is very small compared with the upper compartment. |  | Usage: þorgh neither upper nor lower compartment is closed in this version. |
| H | |||
 | Usage: how 'h' is generally fairly consistent in formation with variation in the length of tail. However, see versions 3 and 4. |  | Usage: schal |
 | Usage: schrift head-stroke through shoulder, limb and tail are a single stroke in this example. |  | Usage: He the same seems to apply here too. |
| R | |||
 | Usage: Wher modern 'r' is used in all positions and is the preferred graph. |  | Usage: bereþ long 'r' is also used on occasion. |
 | Usage: more z'-shaped 'r', with and without otiose stroke is used mainly after 'o' and occasionally follows other graphs such as 'w'. |  | Usage: fer 'r' in final position with flourish. |
| S | |||
 | Usage: schape this peculiar version of sigma 's' is used in initial and in final position. |  | Usage: was a sort-of '8'-shaped version of 's' in final position. |
 | Usage: sorow long 's' is also used initially and medially. |  | Usage: Si serpentine 'S' with long horizontal base stroke. |
| W | |||
 | Usage: was the scribe has a variety of 'w' graphs. |  | Usage: eft(er)ward |
 | Usage: oþ(er)wise |  | Usage: Wher upper case graph tinged with yellow at the beginning of a line. |
| Y | |||
 | Usage: my the right limb turns to connect at the fork (here it is missed), and continues as the tail in a straight line at an oblique angle. |  | Usage: thynk as with the unusual variations in other of the scribe's graphs, 'y' also sometimes has a peculiarity. The left limb is often curved from the left at the top to the right at the fork. |
 | Usage: gyle |  | Usage: treuly |
| Thorn and Yogh | |||
 | Usage: bereþ þe two different shapes for thorn in this example. |  | Usage: þus yet another version of the graph. Thorn is used frequently by the scribe. |
 | Usage: nouȝt yogh is used as equivalent of both 'gh' and 'y'. |  | Usage: ȝif |